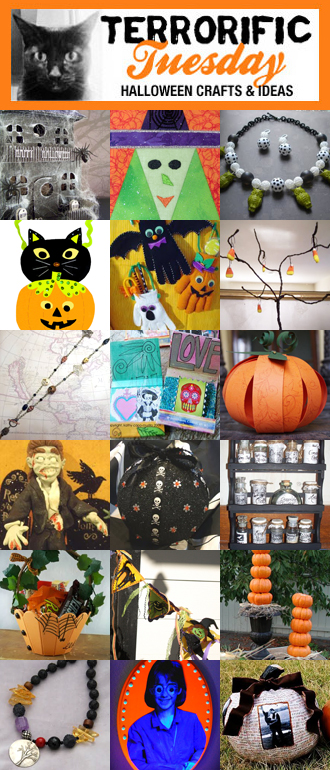
Tuesday, October 27, 2009

Terrorific Tuesday Week 4

terrorifictuesday-week-4Align Center

I missed the last week of Terrorific Tuesday, but here are the other links to the great projects posted by everyone else that took part in it!

Trick or Treat!
Frame and post it note holder dressed for Halloween

Costumed Kokeshi Dolls
Try out a Halloween idea for a traditional Japanese doll with Crafterella

Halloween Mask
Phyllis Dobbs created a fun and easy Halloween mask - great for adults and kids!

Fun Halloween Lanterns
Stephenie Hamen accessorizes plain paper lanterns with her paper punches.

Black Widow & Bloody Necklaces
Pattie Wack uses 3-D paint to create chokers that will creep out your party guests!

Tutu Cute Halloween Wreath
Vanessa creates an inspired wreath made of tulle!

Mad Scientist Party
Amy of Living Locurto shares a slew of fun ideas to host your own Mad Scientist Party.

Halloween Zombie Dolls
Crafty Chica shows how to add some zombie love to your decor!

Halloweenies!
Boopsie Daisy shares some of the wonderful Halloween dollies that she dreams up!

Crafty Chica's Ghost Story!
Kathy Cano-Murillo shares a haunted crafty tale!

Halloween Cone Witches
Make these cute little paper cone witches for Halloween!

Halloween Leftovers
Mel takes the leftovers from last week's project and makes a cool Goth choker!

Brenda Pinnick Halloween Owls
Seasonal Owls for Scaring or Delighting Trick or Treaters

The Impatient Crafter
Margot creates another spooktacular mixed media necklace with a bite.

Halloween Batty Windchime
Heidi Borchers creates a super cute windchime with personality!

Kitschy Kitschy BOO
Add some Halloween flair to your day with this cute kitschy bracelet and earring combo!

Simple Halloween Gift Tags
Studio Mama makes a strong impact with these quick and easy tags!

Strands of Beads
Melissa once again gives some pretty flower beads a Gothic makeover with this simple earring design

Costume Fun
Sharron Westerfield shares her passion for costume-making and the joy it brings her grandchildren.

Return of the Birthday Zombie
Candace is cracking herself up with this ghoulish gift box idea

Doodle Pumpkin
Swelldesigner a.k.a. Alexa Westerfield shows you how to make a fun pumpkin on the fly!

Sunday, October 25, 2009

Kitschy Kitschy BOO

Welcome to Terrorific Tuesday 2009!!!
Week 4


Add some Halloween flair to your day with this cute kitschy bracelet and earring combo!


Materials
  • 1 bag of plastic dollar store Halloween rings with removable rings - $1
  • a bit of chain -$2
  • jump rings - $1
  • head pins and eye pins - $2
  • a clasp of some sort - $1
  • 2 pairs of pliers, such as flat nosed and round nosed - if you buy just the two sets of pliers, the price could be about $6. I went to my local hardware store and got a set of 5 different pliers for about the same price.
  • some acrylic faceted beads - $4 (I had a big bag of them)
  • earring wires - $1
I want to make one! How much did it cost you?
If you have none of these items on hand - $18 plus tax
The items marked in green were purchased for this project, and the purple items were on-hand.


Let's Craft!!


Measure your wrist, so that the bracelet with be comfy. You don't want to meausre too loosely or too tightly, because you're going to be adding a clasp which is going to add just a touch of extra length. Most standard bracelet sizes are between 6 and 8 inches long. Cut your chain to this length.

Pick out the rings you'd like on your bracelet and earrings. Remove the ring part. If you have a drill, use it to put a small hole in the item. If you don't have a drill, you could probably use a safety pin to CAREFULLY poke a hole.


Once you have the holes, open a jump ring and throw those bad boys on the chain. If you don't know how to open and close a jump ring, Margot Potter has an excellent video on youtube that shows you how! You can also use a jump ring to attach the clasp. I just used the chain itself.

Put some beads on your head pins, attach them to the chain as well.

For the earrings, just follow the same steps as the bracelet. Except this time, we're going to use the eye pins and thread some beads on them. Use a jump ring to attach your kitch to the eye. Create a loop at the other end for the earring wire, and add the wire.

Voila!

Tuesday, October 20, 2009

Terrorific Tuesday - Week 3

terrorific-tuesday-week-3


Spooky Spider House
Silvia creates a miniature haunted house that is spooky and oh-so fun!

Witchy Embroidered Postcard
Sharron Westerfield brews up a whimsical witch postcard

The Impatient Crafter
Vintage plastic owls become the focal point of a charming necklace you can wear for Halloween and all year round!

Pumpkin and cat felt treat bag
Felt bag that can also be made as a wall hanging or door hanger

Cheryl Ball's Halloween Door Hangers
Create these door hangers from inexpensive gloves for Trick of Treaters

My Big Mouth
Make a creepy wire tree just in time for Halloween!

Mel's Day of the Dead Necklace
Linked chain, skulls and spiderwebs for Dia de los Muertos

Crafty Chica's Matchbook Shrines
Adorable little folding shrines that fit in your pocket!

Paper Pumpkin
Make a plump paper pumpkin from some strips of paper plus a little Halloween craftiness!

Polymer Clay Zombie
Candace's diabolical plan to populate the world with zombies continues!

The Impatient Crafter for iLoveToCreate
Make a retro style styrofoam ornament into a fab Halloween Party centerpiece! Madge shows you how using iLoveToCreate products!

How to Make a Spooky Spice Rack
Come make a spooky spice rack with Crafterella, she's sharing her unique labels with everyone!

Halloween Treat Tote
Conjure up a quick Halloween cupcake basket using new ScoreBoard dies!

Brenda Pinnick's Halloween Banner
A little scary, a little fun, this delightful banner celebrates all things Halloween. Made using Brenda Pinnick Sizzix dies, glitter and ribbon.

Creepy Candlesticks
Pattie Wack turns mini pumpkins into a boo-tiful Halloween lighting idea!

Strands of Beads
Melissa explores the holiday possibilities in a black and white checkered bead

Glow in the Dork Wall Hanging
Turn off the lights and have a laugh with this goofy wall hanging from Alexa Westerfield!

Picture Perfect Pumpkin
Vanessa Coppola turns a traditional pumpkin into a decopauged masterpiece!

Wednesday, October 14, 2009

A fun Second Life necklace

My BFF Lil got me hooked on this online virtual world called Second Life (SL for short). It's hard to explain. I sometimes tell people that it's like the Sims, but online. But that's not quite right...

In SL, I am a Neko (that's japanese for cat). Neko is someone on SL who maintains a human body, with cat-like additions - usually kitty ears and a tail. I have several different tails, but I prefer my red fluffy tail. I have ears, of course. I also have whiskers and orange cat-like eyes. M calls it "playing dollies" because he doesn't understand it. That's ok.

In SL, there is a keyboard shortcut that brings you to your home spot, and I was inspired to create this necklace for my friend.

I dismantled a keyboard for the Ctrl, Shift and H keys. These keys are pressed to bring you to your home spot within the application.

I drilled holes in the keys to connect them with copper wire. I used Blue Moon silver plated chain, and attached a lobster claw clasp at the side. In the picture below, you can see that I usd copper wire to create a wrapped dangle with red glass beads. I used two 1" lengths of chain to create the little loop and heart dangle.

The circle is shrink plastic. On the back, I used lavender and baby pink to create swirls. Hot pink paw prints are also on the back. On the front, I created a red heart outlined in purple and wrote the letter I above the heart and NEKO under it. A blue fish skeleton is on the side of that.


It's to remind her that she always has a home, no matter how far she may roam - in both Real Life and Second Life.

I <3 U Lil :D

Tuesday, October 13, 2009

Terrorific Tuesday Week 2

terrorific tuesday week 2


This little light
Light up the night with this cute pumpkin votive holder from Kat the Fearless Crafter.

Sugar Skull Bracelet & Bats in the Belfry Choker
Candace is having way too much fun with shrink plastc! Check out these fun and charming crafts on the Spirit Clay blog.

Dollar Tree Decorated Lights Tutorial
Come and decorate some Dollar Tree Skulls with Crafterella, don't forget your sharpie markers!

The Impatient Crafter for iLoveToCreate
Whip up a Halloween Invitation that's a real 'hoot' with Madge in this project for iLoveToCreate!

Spooky Halloween Coasters
Cheryl Ball of Still Crafty After 50 shares some fun, funky, and spirited coasters!

Halloween Treat Bowl
Create a fun and festive treat dish with Inspired at Home!

Strands of Beads
Melissa creates a whimsical seasonal necklace based on the theme "pushing up daisies".

Basic Black Box Meets Pumpkin Patch
Whip up Halloween favor boxes in minutes with brand new Sizzix ScoreBoard dies.

Mummy Mannequin
Create a mummy that will be a memorable accent at your Halloween party with Pattiewack!

Munchkin Mama's Crispy Peanut Butter Balls
Munchkin Mama has a great recipe for no bake peanut butter balls that the whole family will want to make!

Witch Parking!!
Make a "Witch Parking" sign on the Mucky Finger's blog!

Vintage-Inspired Halloween Tree Topper
Shannon shows off her new Halloween tree topper, inspired by vintage crepe paper crafts!

The Impatient Crafter
Make a whimsical and elegant Halloween necklace with Madge!

Jack-O-Lantern Waterfalls
Studio Mama shows you how to make some fun and festive earrings for the Halloween season.

Glow in the Dark Jewelry
Use glow in the dark polymer clay and rubber stamps to produce eerie Halloween jewerly.

Crafty Chica's Paint Drip Pumpkin!
A loca idea on the fly turned out muy fantastico!

Free Printable Halloween Cup Sleeves
You’ll be a hit with these labels for hot beverages at your Halloween party.

Scarecow Sweatshirt
Sharron Westerfield shares a cute scarecrow sweatshirt she made from a fun downloadable pattern from Janome!

Halloween Ribbon Brooches and Fascinators
Alexa Westerfield a.k.a. Swelldesigner whips some quick and cute Halloween accessories!

R.I.P. Skeleton in Coffin
Guarantee a spooktacular Halloween Party with a skeleton in a coffin treat filled centerpiece!

Happy October Kewpies
Find inspiration in this colorful and cute candy corn Kewpie photo from Boopsie Daisy!

If you would like to join in the fun next week, e-mail Alexa at swelldesigner@yahoo.com and put in your subject line "Terrorific Tuesday". She'll get you added to the group!

Sunday, October 11, 2009

This little light

Welcome to Terrorific Tuesday 2009!!!
Week 2


Have you seen this pumpkin?
Be on the lookout for cuteness!


If you google Jack-o-lanterns, you will find so much information that it will make your eyes pop. Everything from carving patterns to several stories of its history to a college humor magazine.

The story I've always heard about it's orgins start in the "old country" (not sure which one), where lanterns were created not only from pumpkins, but turnips, and potatoes. Many people believe that the veil between the living and the dead is thinnest around Halloween time. The purpose of the lanterns was to light the way for the beloved spirits to find their way home. The original lanterns didn't have faces carved into them, just a simple hole or design known by the family.

No matter what you believe, Jack-o-lanterns have become an integral part of Halloween. What better (and less messy) way to light up the night for spooks than a candle holder?

I'm still trying to craft with items I have on-hand (or with very little spending!) I learned quite a bit from this project.


Materials
  • white tissue paper (if you don't feel up to a challenge, get at least 1 sheet each of orange green, and black) - $1
  • If you use pre-colored tissue paper - skip these: orange, yellow, green, and black pigment or permanent stamp pads (or permanent markers). Do NOT use dye based stamp pads. You'll see why in a sec.- $4
  • Newspaper or some other method of protecting your work surface - $1
  • Decoupage medium (or if you don't have any, mix white glue and water equally to get a milky consistency medium)
  • a glass "ivy" bowl - $1
  • 20 gauge craft wire - $1
  • plastic faceted beads - $4 for the big bag

I want to make one! How much did it cost you?
If you have none of these items on hand - $12 plus tax
The items marked in green were purchased for this project, and the purple items were on-hand.


*** Safety First!!! ***
and Disclaimer

Because this is a candle holder, I'd like to cover some safety tips.
  1. I recommend gluing the paper to the outside of the bowl.
  2. I also recommend using tea lights in this project.
  3. Never leave a burning candle unattended.
  4. Make sure the candle has been put out completely before leaving the room.
  5. Be sure to keep it on a stable, heat-safe surface.
  6. Keep the candle away from other flammable objects.
  7. Keep the candle away from drafts.
  8. Keep the candle out of reach of children and pets.
  9. Always burn the candle in a well-ventilated room. Well-ventilated. Not drafty.
  10. Do not touch a burning candle, play with the flame or melted wax.

I am not responsible for any losses or damage that you may incur while using a candle. If you aren't sure about anything listed in my safety tips, use a battery-operated, flameless candle.

If you would like a printable version of candle safety tips, visit the National Candle Association's Candle Safety Rules page.

*** End Safety Note ***


Let's Craft!!


Step 1

Lay down the newspaper. Place at least 1 sheet of white tissue paper down. Get the yellow stamp pad, and just randomly stamp the paper. Do this gently, especially if this is a brand new stamp pad. We just want to color the paper, not saturate it to the point that it rips.

Once the yellow is dry, do the same thing with the orange - yes, on the same sheet as the yellow. You should end up with a sheet that looks like this:


Do the same with the yellow and green on a new sheet of tissue paper. Because I had older stamp pads, they were nearly dried out. I used my permanent markers to color my sheet.


Step 2

Rip the paper into strips. I ripped my "stem" paper so that the lines would be vertical, to look like a stem once decopauged.

If you don't have any decopauge medium in a jar, prepare some at this point. Just mix white glue with water in equal amounts, to make a milky looking liquid. You won't need as much as you think you will.


Step 3

Gently gently gently start gluing the paper to the bowl. I placed my strips on the outside of the bowl, because I'm not sure how flammable the glue will be once it's dried. Remember how I said to avoid dye based stamp pads? Here is why you should:


The dye started coming off the paper, and leaching onto my brush. It got in the medium, as well. The permanent marker I used for the stem paper didn't do this. Very important to use permanent. Now I'm not really sure how the pigment stamp pad would stand up to the medium. Must test this out later.


Step 4

While it is drying, you can string the green beads onto the wire. Be sure to leave a bit of wiggle room between the beads, because you are going to wrap this around the neck of the vase. Husband said "It looks like the (the beloved soft drink character that breaks through walls saying 'Oh yeah')."


Step 5

He sure does look like that soft drink guy. So I hot-glued some faux-liage and autumnal accents to hide the base. Now he looks less likely to break through my wall.

Tuesday, October 06, 2009

It's Terrorific Tuesday Link time!

Here ia a list of all the submissions for Week 1!

terrorific-tuesday-2009-wee


Studio Mama Blog
Creep out your friends with this Leatherface-esque collection of eyeballs strung on hardware!

The Impatient Crafter
Halloween is right around the corner and Madge kicks off the season with a stunningly spooky mixed media necklace and a bonus short story sure to send shivers up your spine!

Living Locurto
Kids will love dressing up this cute doggie in different costumes with this Halloween Doggie Dress-Up Free Printable!

Sharron Westerfield
Create an adorable jack-o-lantern baby bib for your favorite little one!

Crafterella
Join Crafterella in making you own spooky Mantipi specimen jar (with tutorial) using polymer clay.

The Fearless Crafter
Welcome your guests with this cute and creepy Spooky Spider Wreath wreath!

My Big Mouth
Craft a mini Halloween candy dish that looks like Frankenstein

Strands of Beads
Melissa creates a simple skully necklace to celebrate the season.

Kate Pullen, the Rubber Stamping Guide at About.com
Create a Halloween pyramid box perfect for use as a Halloween favor box or as an unusual decoration.

Allee Marderosian for iLoveToCreate
Take your look to the Darkside with these Twilight Romance tees, perfect for Halloween festivities or everyday adventures!

Candace Jedrowicz - Spirit Clay
These sparkly Candy Corn Riot earrings are made using real candy corn! No kidding!

Brenda Pinnick
Brenda uses her Sizzix Die to create a batty neck piece you'll want to sink your teeth into!

The Impatient Crafter for iLoveToCreate
Madge shows you how to make a super cute Halloween tote in this week's I Love to Create post!

Crafty Chica
The Chica, ILoveToCreate & Craft Zine have teamed up for a skullerific Dia de los Muertos Shrine Contest!

Alexa Westerfield a.k.a. Swelldesigner
Inspired by her love for True Blood, Swelldesigner takes a stab at bloody white pumpkins!

Sunday, October 04, 2009

Spooky Spider Wreath

Welcome to Terrorific Tuesday 2009!!!
Week 1

Welcome your guests with this perfectly creepy spider wreath!

I've been on a kick to create some type of decoration for my door for each holiday or special occassion. Considering my current jobless situation, it's an added challenge to use the supplies I have or get them cheap.


Materials:

  • one 9 inch grapevine wreath - $1
  • two 9 foot purple garlands (mine had sparkly skulls attached) - $2
  • one pack of 2 medium flocked spiders - $1
  • one bag of little plastic spiders - $1
  • 3-pack of Halloween glitter from Joann's dollar bins (white orange, black) - $1
  • white thread - $1
  • white tacky glue - $1
  • glue sticks - $1
  • glue gun - $1
  • set of 20 battery-operated Halloween lights (the teeny bulbs, maybe called rice lights?) - $2
  • batteries - $4

I want to make one! How much did it cost you?

If you have none of these items on hand - $16 plus tax
The items marked in green were purchased for this project, and the purple items were on-hand. You are going to get some more use out of the thread, glue and glue gun (why would you NOT have one?)


Let's Craft!


Step 1

Remove the glittery skulls from the garland. Save them for another craft project. (hey, when you're crafting on a budget - Waste NOT!) Also save the twist ties. You really will use them, I promise.


Step 2

Use the glitter to glam up the spiders. I just added giltter to the circle on medium spider, as well as her leg joints. The smaller spiders got glitter on their abdomen section.


Step 3

While the spiders are drying, use a twist tie to secure one end of a garland to the wreath. Wrap the garland around the wreath. Using another twist tie, connect the garlands to each other and continue wrapping. Use one more twist tie to connect the final ends of the garland, as well as to secure this end to the wreath. Make sure none of the wreath is visible.


Step 4

Glue the battery pack to the back of the wreath. Wrap the lights around, then use hot glue to secure the lights where you want them positioned. I added the batteries, so I could see where the lights were going to look best.


Step 5

Glue the spiders to the wreath. To make the hanging spiders, just hot glue the thread to their bellies and to the garland.

For added spidery goodness, I very carefully used the glue gun to produce those normally annoying spider webby tendrils that appear after squeezing out some glue.


Hang, then step back and enjoy your wreath.


Spooky!!